I built four bee-hive scales according to the great instructions of the Beelogger project.
Remarks:
- I used the “2 holes per side”-variant of the Load Cell Sensor (CZL601 instead of the CZL601-AC), it works fine too.
In my test-setup I connected it like this:
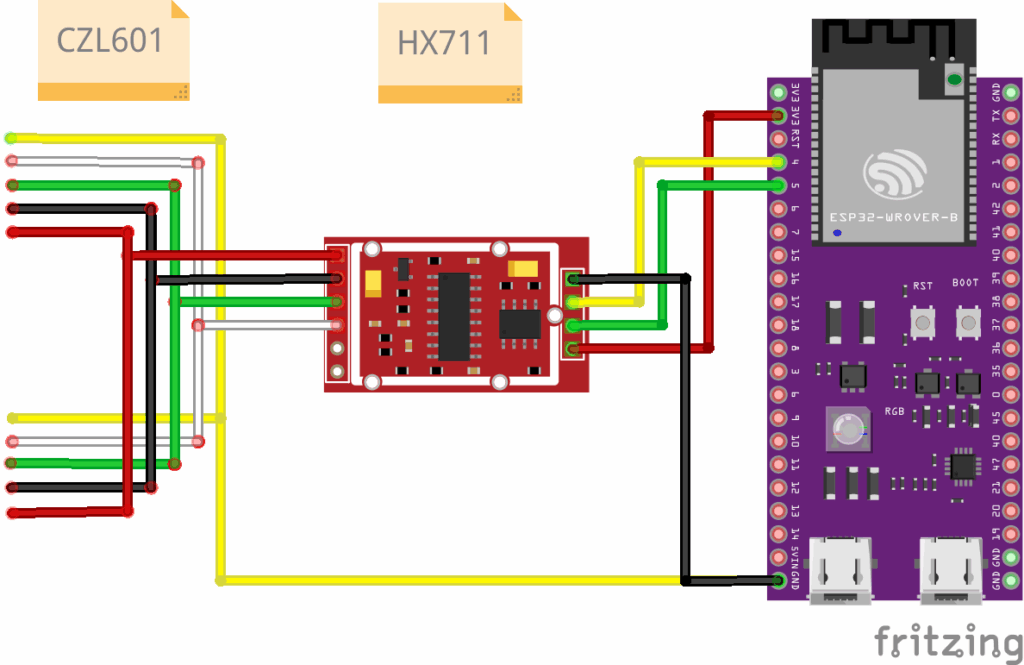
NOTE: Do not use this wiring in production. It’s suitable for testing purposes only.
The HX711-breakout-boards do not work as intended when powered with 3.3V.
For details, see https://community.hiveeyes.org/t/stromversorgung-hx711/893/16
I see two possible solutions for this problem:
- Exchanging some resistors on the hx711-breakout-board
- Turns out this is not the way to go, there are at least 4 different versions of the board:
- blue PCB:
exchanging the resistors is doable, but needs experience - green PCB:
exchanging the resistors is hard, special equipment needed - purple PCB:
exchanging the resistors is practically impossible. - red (the recommend version, it’s shielded) PCB:
exchanging the resistors is practically impossible.
- blue PCB:
- Turns out this is not the way to go, there are at least 4 different versions of the board:
- Use another breakout board that doesn’t cause that much problems, I ordered a NAU7802-breakout-board for testing.
- This is the way to go:
- It’s connected via I2C, this makes the wiring more easy
- it works out-of-the-box with 3.3V
- This is the way to go:
For calibrating, I used weight-lifting weights.
The testing-code for the HX711 :
substitutions:
  update_interval: 5s

sensor:
  - platform: hx711
    name: "HX711 Weight"
    dout_pin: GPIO4
    clk_pin: GPIO5
    gain: 128
    update_interval: ${update_interval}
    filters:
      - calibrate_linear:
          datapoints:
          # measuring at 25 °C
          -  77915  -> 0
          -  167520 -> 4.08    # empty super + tension belt
          -  205782 -> 5.88    # super with empty frames + tension belt
          -  308103 -> 9.08    # super with empty frames + tension belt + 5kg
          -  413973 -> 14.08   # super with empty frames + tension belt + 10kg
          ...
          - 1554032 -> 69.08   # super with empty frames + tension belt + 65kg
          - 1655332 -> 74.08   # super with empty frames + tension belt + 70kg
      - clamp:
          min_value: 0
          ignore_out_of_range: true
Compensating the temperature drift of the scale is still an open TODO.
Leave a Reply